IndieAuth
“My approach to security, and I think this is true for others involved with OAuth, is to strive for the best security that will actually work.” — Blaine Cook
OAuth is a standard for signing in to web apps. It is used by a platform such as Twitter to grant another app access to a user’s data or the ability to post to that user’s account. All major platforms like Twitter, Facebook, GitHub, and Medium have adopted a version of OAuth for their API.
An important goal with OAuth was to discourage apps from needing to ask for your password directly. OAuth allows apps to get access to your information while making sure that you only ever enter your password in one place: on the platform where your account was created.
IndieAuth is an IndieWeb-friendly method of authentication. IndieAuth is based on OAuth, but with a couple important twists that make it work for independent blogs:
- Identity is built around domain names. When you use IndieAuth, you sign in with your domain name, not an email address or username.
- Discovery is handled through a
<link>tag on your web site. This lets you delegate authentication for your domain name to other services.
When all our content is hosted at our domain name, with the incentive to keep that domain name for years or decades, that domain name becomes our identity on the web. If it’s our identity, why not use it for signing in with apps that need to authenticate us?
A username might be different on different platforms. A domain name for your blog is always you.
As services became more centralized, they also consolidated. Photos to Flickr. Videos to YouTube. Twitter and Facebook for social media. With a small number of services, it wasn’t too difficult for an app to support at least a few popular platforms for sign-in.
Some services included a hard-coded list of authentication providers, sometimes half a dozen different social networks that you could choose to log in with. Even now, it’s common to see 3-4 services listed, such as in this sign-in screen from Vrbo:

If an app wanted to post to both Twitter and Facebook, for example, it could register with those platforms. The developer of the app would usually need to fill in some details about their application, often requiring approval. By registering, apps would get a “client ID” and “client secret” that could be used with OAuth.
Most modern platforms require this registration before their API can be used. While this helps prevent abuse of the API, it also locks down the platform, giving the platform owner control over what types of apps can be built.
An app uses the “client ID” and “client secret” as part of the flow for building sign-in URLs and handling callbacks from the platform back to their app. After the user approves the app, the app receives separate authentication tokens that can be used to make requests to the platform on behalf of the user.
With a more distributed web, there won’t just be a few popular sites to register an app with. There will be many thousands of sites. There needs to be a shortcut around registration.
In adapting OAuth for the IndieWeb, Aaron Parecki summarized the problem this way:
The first major hurdle to overcome is the need for the developer to register to get API keys for the service. In a world where everyone’s own website is its own OAuth server, it’s obviously not practical to have an app developer register API keys at each.
The solution is to replace the “client ID” — which is usually a string of random numbers that the developer gets when registering their app — with something the developer already knows: the URL for their app. The URL for their app can also be used to retrieve an image for the app, and both the image and URL can be shown to the user so they know which app is requesting access.
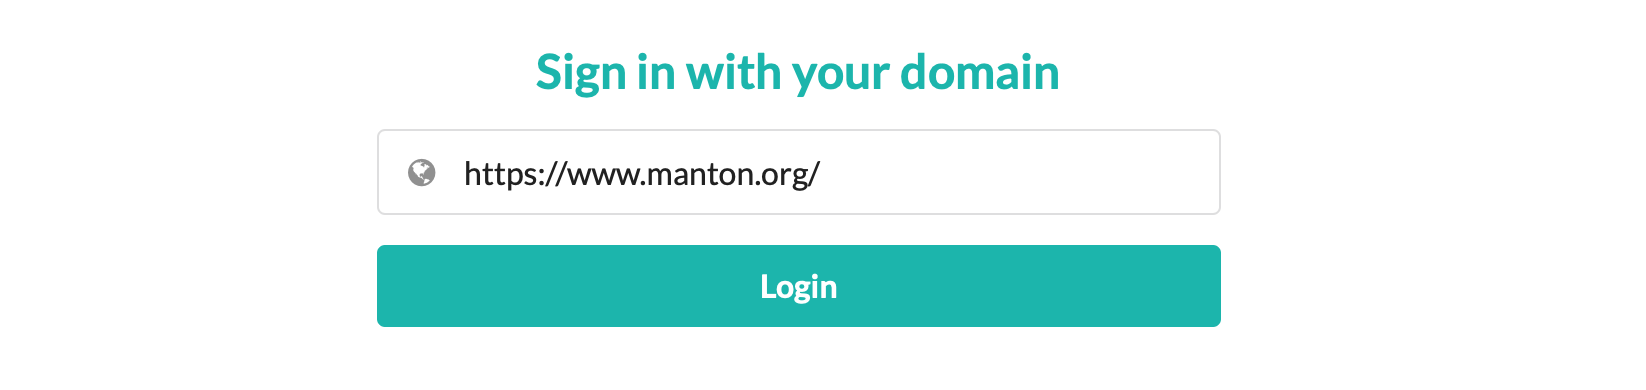
IndieWeb-friendly apps like OwnYourSwarm use IndieAuth to sign in to Micro.blog. First, the user is asked to enter the domain name for their Micro.blog account:
Next, Micro.blog fetches some information from their site to know which service is handling authentication for the user. For OAuth, API URLs would be provided in a platform’s API documentation and the developer would use those URLs in their code. For IndieAuth, because there are many websites and authentication providers, these URLs are stored in link tags on the site’s home page:
<link rel="authorization_endpoint" href="https://micro.blog/indieauth/auth">
<link rel="token_endpoint" href="https://micro.blog/indieauth/token">
The user is then directed to sign in and approve access to the app OwnYourSwarm:
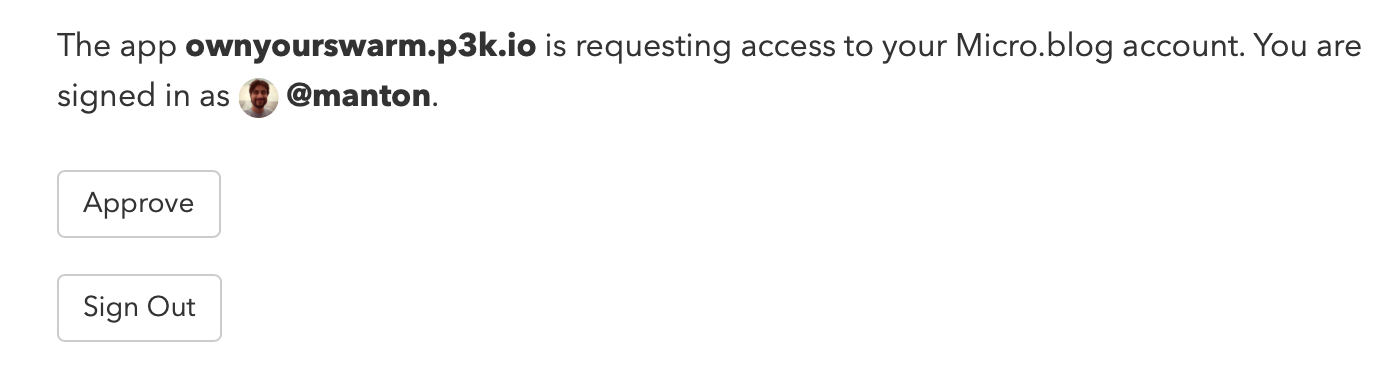
Behind the scenes, an app like OwnYourSwarm is using the authorization_endpoint and token_endpoint URLs retrieved from the user’s link tags to request tokens that can be used to make API requests, such as posting a new blog post to the user’s blog.
The next step is to build a URL based on the authorization_endpoint that the client app will open in a web browser for the user. This URL will have several parameters appended to it:
me: the user’s blog URL.redirect_uri: a URL to redirect back to the client app.client_id: a URL to identify the client app.state: a random string that we can use to check the redirect for tampering.scope: the type of permission we need, such as “create” for creating new blog posts.response_type: this value should always be “code”.
Appended together, the important parts of the URL might look something like this if we are using Micro.blog’s authorization endpoint:
https://micro.blog/indieauth/auth?me=https://mydomain.com/&redirect_uri=https://anotherapp.com/callback&...
That URL is then opened in a web browser and the user can confirm giving access to the calling client app.
When the user approves access, they are redirected to a new URL that is based on the redirect_uri parameter. That URL will have 2 parameters appended to it:
code: the authorization code.state: exactly the same value that was originally passed by the client app, so that it can be verified to match.
Now the client app can take the code value and send it with an HTTP POST to the token_endpoint we retrieved from the link tag earlier.
POST /indieauth/token
Content-type: application/x-www-form-urlencoded
Accept: application/json

grant_type=authorization_code&code=ABCDEFG&client_id=https://...&redirect_uri=&https://…&me=https://yourdomain.com/
The response from the token endpoint looks like this:
{
  “access_token”: “ABCDEFG”
  “token_type”: “Bearer”,
  “me”: “https://yourdomain.com/“,
  “scope”: “create”
}
Now the client app can save this access token and use it in other IndieWeb API calls, such as using Micropub to post to the user’s blog.
In these examples, it’s Micro.blog’s own IndieAuth implementation that will handle signing the user in, but the user could delegate authentication to an external service.
IndieLogin.com facilitates this delegation by verifying that your identity matches between your blog and common platforms like Twitter and GitHub.
To get started, make sure you have a rel="me" link on your blog’s home page. These use link tags to point to your profile page on those platforms:
<link rel="me" href="https://twitter.com/your-username" />
<link rel="me" href="https://github.com/your-username" />
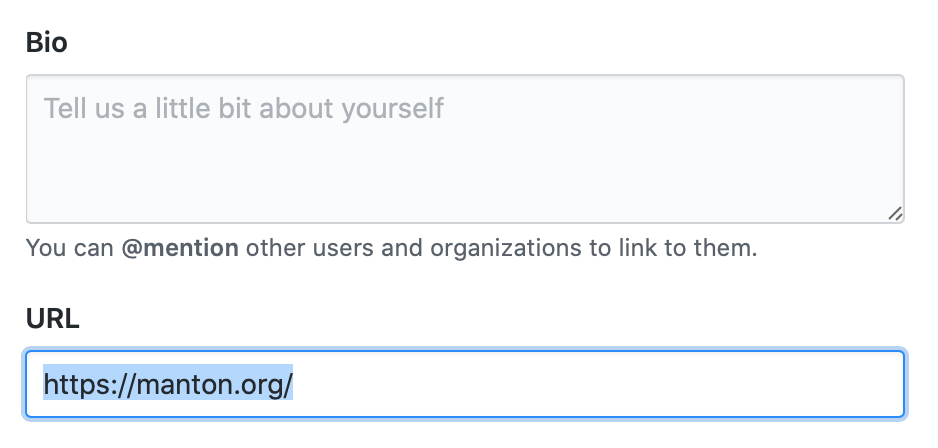
If you’re using a Micro.blog-hosted blog, Micro.blog can also set these for you under the Account → “Edit Apps” page:

You will need a link back to your web site on those other platforms' profile pages. For example on GitHub, click on your profile icon, then choose Settings and fill in your blog URL:
When you use IndieLogin.com to sign in, it can check that these profile links match:
- That your blog links to a platform like Twitter or GitHub that you’ll be using to authenticate.
- That your profile on that platform also links back to your blog, confirming your blog and the profile are owned by the same person.
This method of authentication is also called RelMeAuth.
IndieLogin.com doesn’t need to do this for Micro.blog-hosted blogs because Micro.blog itself is already an IndieAuth provider.
If you’re building a simple web app that needs to verify someone’s identity, you can link to IndieLogin.com to handle the authentication for you. IndieLogin.com will use either RelMeAuth or a built-in IndieAuth provider, such as Micro.blog.
In its simplest form, create a button in your web app that will link to IndieAuth. You should include hidden fields for your client ID, callback redirect URL, and a random number state that can be verified to make sure the request originated on your own form:
<form action="https://indielogin.com/auth" method="GET">
  <button type="submit">Sign in with IndieAuth</button>
  <input type="hidden" name="client_id" value="https://your-app.com/" />
  <input type="hidden" name="redirect_uri" value="https://your-app/callback" />
  <input type="hidden" name="state" value="123456" />
</form>
After clicking the button, the user will be taken to IndieLogin.com to enter their domain name. IndieLogin.com will do all the work to verify the user’s identity, and then redirect back to your callback with a code value:
https://your-app.com/callback?code=ABCDEFG&state=123456
From there, your web app should make a request to IndieLogin.com with the code to retrieve information about the user:
POST https://indielogin.com/auth
Content-Type: application/x-www-form-urlencoded
Accept: application/json

code=ABCDEFG&redirect_uri=https://your-app.com/callback&
client_id=https://your-app.com/
The response will have the user’s verified web site URL:
{
  "me": "https://manton.org/"
}
See the IndieLogin.com API page for more options on working with IndieLogin.
IndieAuth can be used to grant access to an API that can handle anything that is appropriate for that platform, but in practice the most common API call is to create a new blog post. Creating new blog posts is handled with the Micropub API.
Next: Micropub →